What I Learned from a Year of Streaming
I have a tendency to get really into my hobbies and streaming is no exception. It turned out to be a deeper rabbit hole than I imagined and I quickly discovered if you want to set up a quality stream there is A LOT that goes into it. I know, big surprise, right?
After weeks of ordering the wrong cables, finding out my camera needs clean HDMI ouput (whatever that means), and getting endlessly frustrated by Open Broadcaster Software (OBS, which is used to manage your streams), I decided to create this guide that I would have loved to have available to me when I started on this journey.
Computer
All the popular streaming platforms have recommended hardware requirements for streaming. Depending on what you're streaming you can most likely get by with a laptop. However, if you're going to be streaming while using apps that are memory or CPU intensive you may run into issues with stream quality.
I use a Macbook Pro and a lot of the recommendations here will be Mac focused but should be transferable to Windows as well.
Platform
Why I Picked Twitch
Most people seem to still stream on Twitch, however Mixr, Microsoft's streaming platform, as well as YouTube, Facebook, and Twitter are also options. I chose to stick with Twitch because I could find the most resources on it. Since I had no idea what I was doing, this was a big plus for me. Also, a lot of my friends use Twitch already so why not!
Targeting Multiple Platforms
I've been looking into Restream.io because it allows you to stream to multiple platforms simultaneously. You can connect OBS (I explain OBS in the setup section) and then stream to 10+ platforms including Twitch, Facebook, Twitter, YouTube, and Mixr.
Setup
Open Broadcaster Software
OBS is the software you use to set up the scenes you'll stream. This is where you'll spend most of your time when it comes to setting up and managing your stream.
This article has an in-depth guide to setting up OBS with Twitch
SLOBS vs OBS
When it comes to the software used to stream, there are really two major players I am aware of. You have vanilla OBS which has everything you need to stream but is a bit less friendly to beginner streamers.
There are times where you have to install plugins to support certain types of inputs which can feel scary if you're new to streaming.
The other option is Streamlabs OBS or SLOBS for short. This is Streamlabs' version of OBS that has some common plugins already added and some nice features built on top of OBS like automatically pulling in your stream key from the platform you use to sign in with, the studio view, Streamlabs integrations like alert boxes and chat boxes, and more.
Unless otherwise mentioned, everything I talk about applies to SLOBS and OBS.
Understanding Scenes
Scenes are an organized set of inputs (graphics, audio, video, screen captures, etc) used to create the layout you want to stream. You can think of scenes as different views or pages you want to display depending on what you're doing. If you are coding you will want to share your screen whereas if you're just chatting you will want to center on your video input. There is not right or wrong amount of scenes to use, but some common ones are:
- Stream starting soon
- Stream ending soon
- Be right back
- Just chatting - where your camera is the main focused
- Sharing a screen - where you focus on your display
- Get creative here!!
Understanding Sources
Sources are the building blocks of a scene. Each element in a scene is represented as a source. There are all kinds of sources you can add to a scene so I'll just cover the ones I tend to use the most.
- Image - Add images (supports gifs)
- Media - Add videos
- Text - Add text
- Display - Add a display capture
- Audio Input - Add audio from mic, or virtual audio device
- Audio Output - Add desktop audio (only works on Windows)
- Window Capture - Add a specific app window (can't see mouse or cursor like a display capture)
- Video Capture - Add webcam
- Browser - Add websites or local apps/html files (very useful for scripts and interactive components)
- NDI - A video input that works over a local server, used by capture cards and Skype for having guests on stream
Dealing with Display Resolution, Aspect Ratios, and Large Monitors
One of the biggest challenges you'll face when getting started streaming is making sure the video quality going out matches your streaming platform's recommended video quality settings. If your display resolution is too high, viewers won't be able to see what you'r doing when coding, etc. Add in an ultra-wide monitor and getting the proper configuration can be a real PITA.
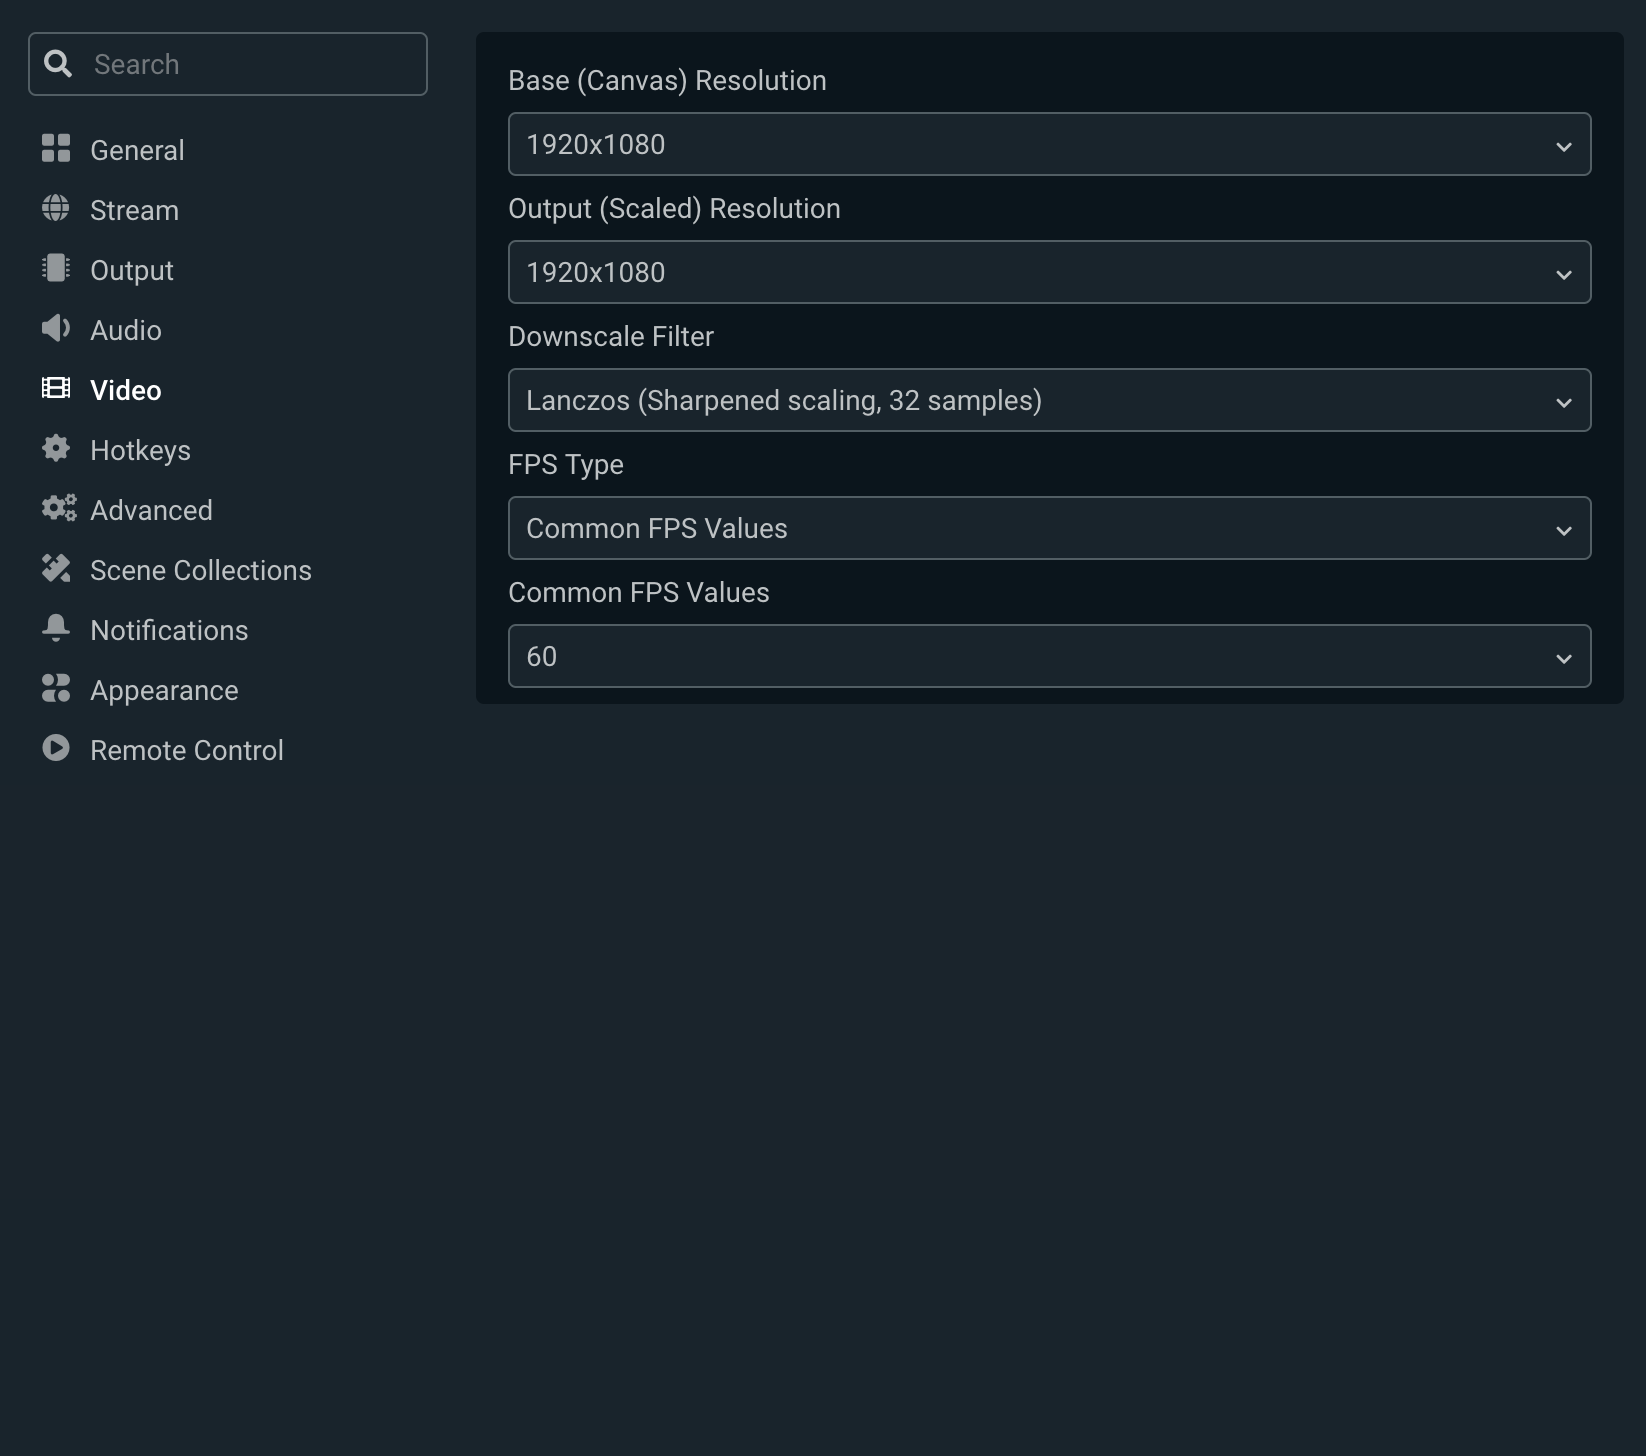
The first step is to set the base resolution and output resolution of your video to 1920x1080 (or 1280x720) in (SL)OBS. You can do that by going to Settings > Video and changing the options.
Next you want to get the display you plan to stream with as close to the same resolution as possible. I use a 34" Dell and set my resolution to 2560x1080. However, when I load that as a source it's still quite wider than I want. I would like to use only 1920 of the 2560 pixels available. This way I can maintain a nice 16:9 aspect ratio which is the common display aspect ratio for most platforms.
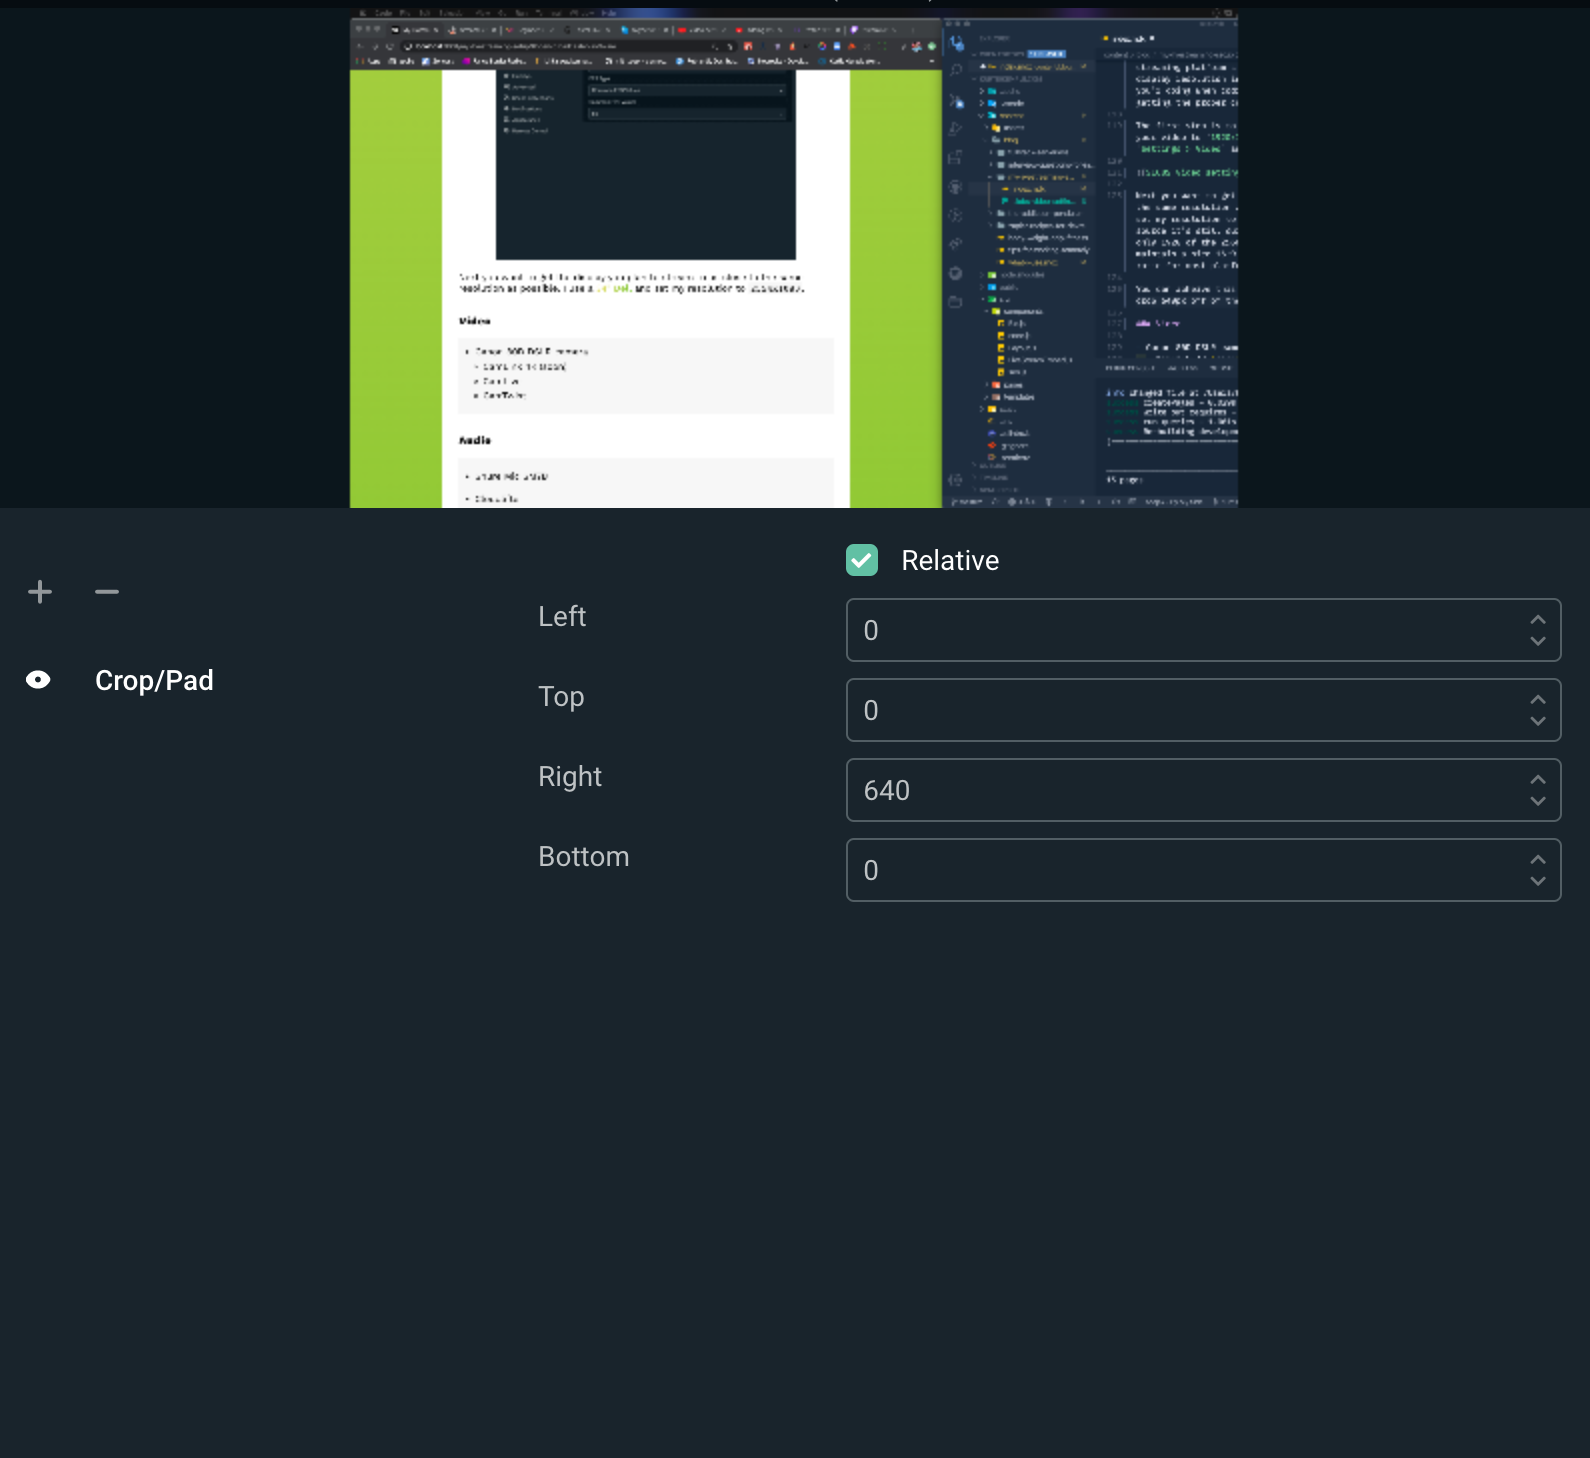
I was able to acheive this by cropping the display in (SL)OBS. In my case I cropped 640px off of the right side (as seen in image below). You can add a crop filter to a source by right-clicking the source and selecting Filters from the menu.
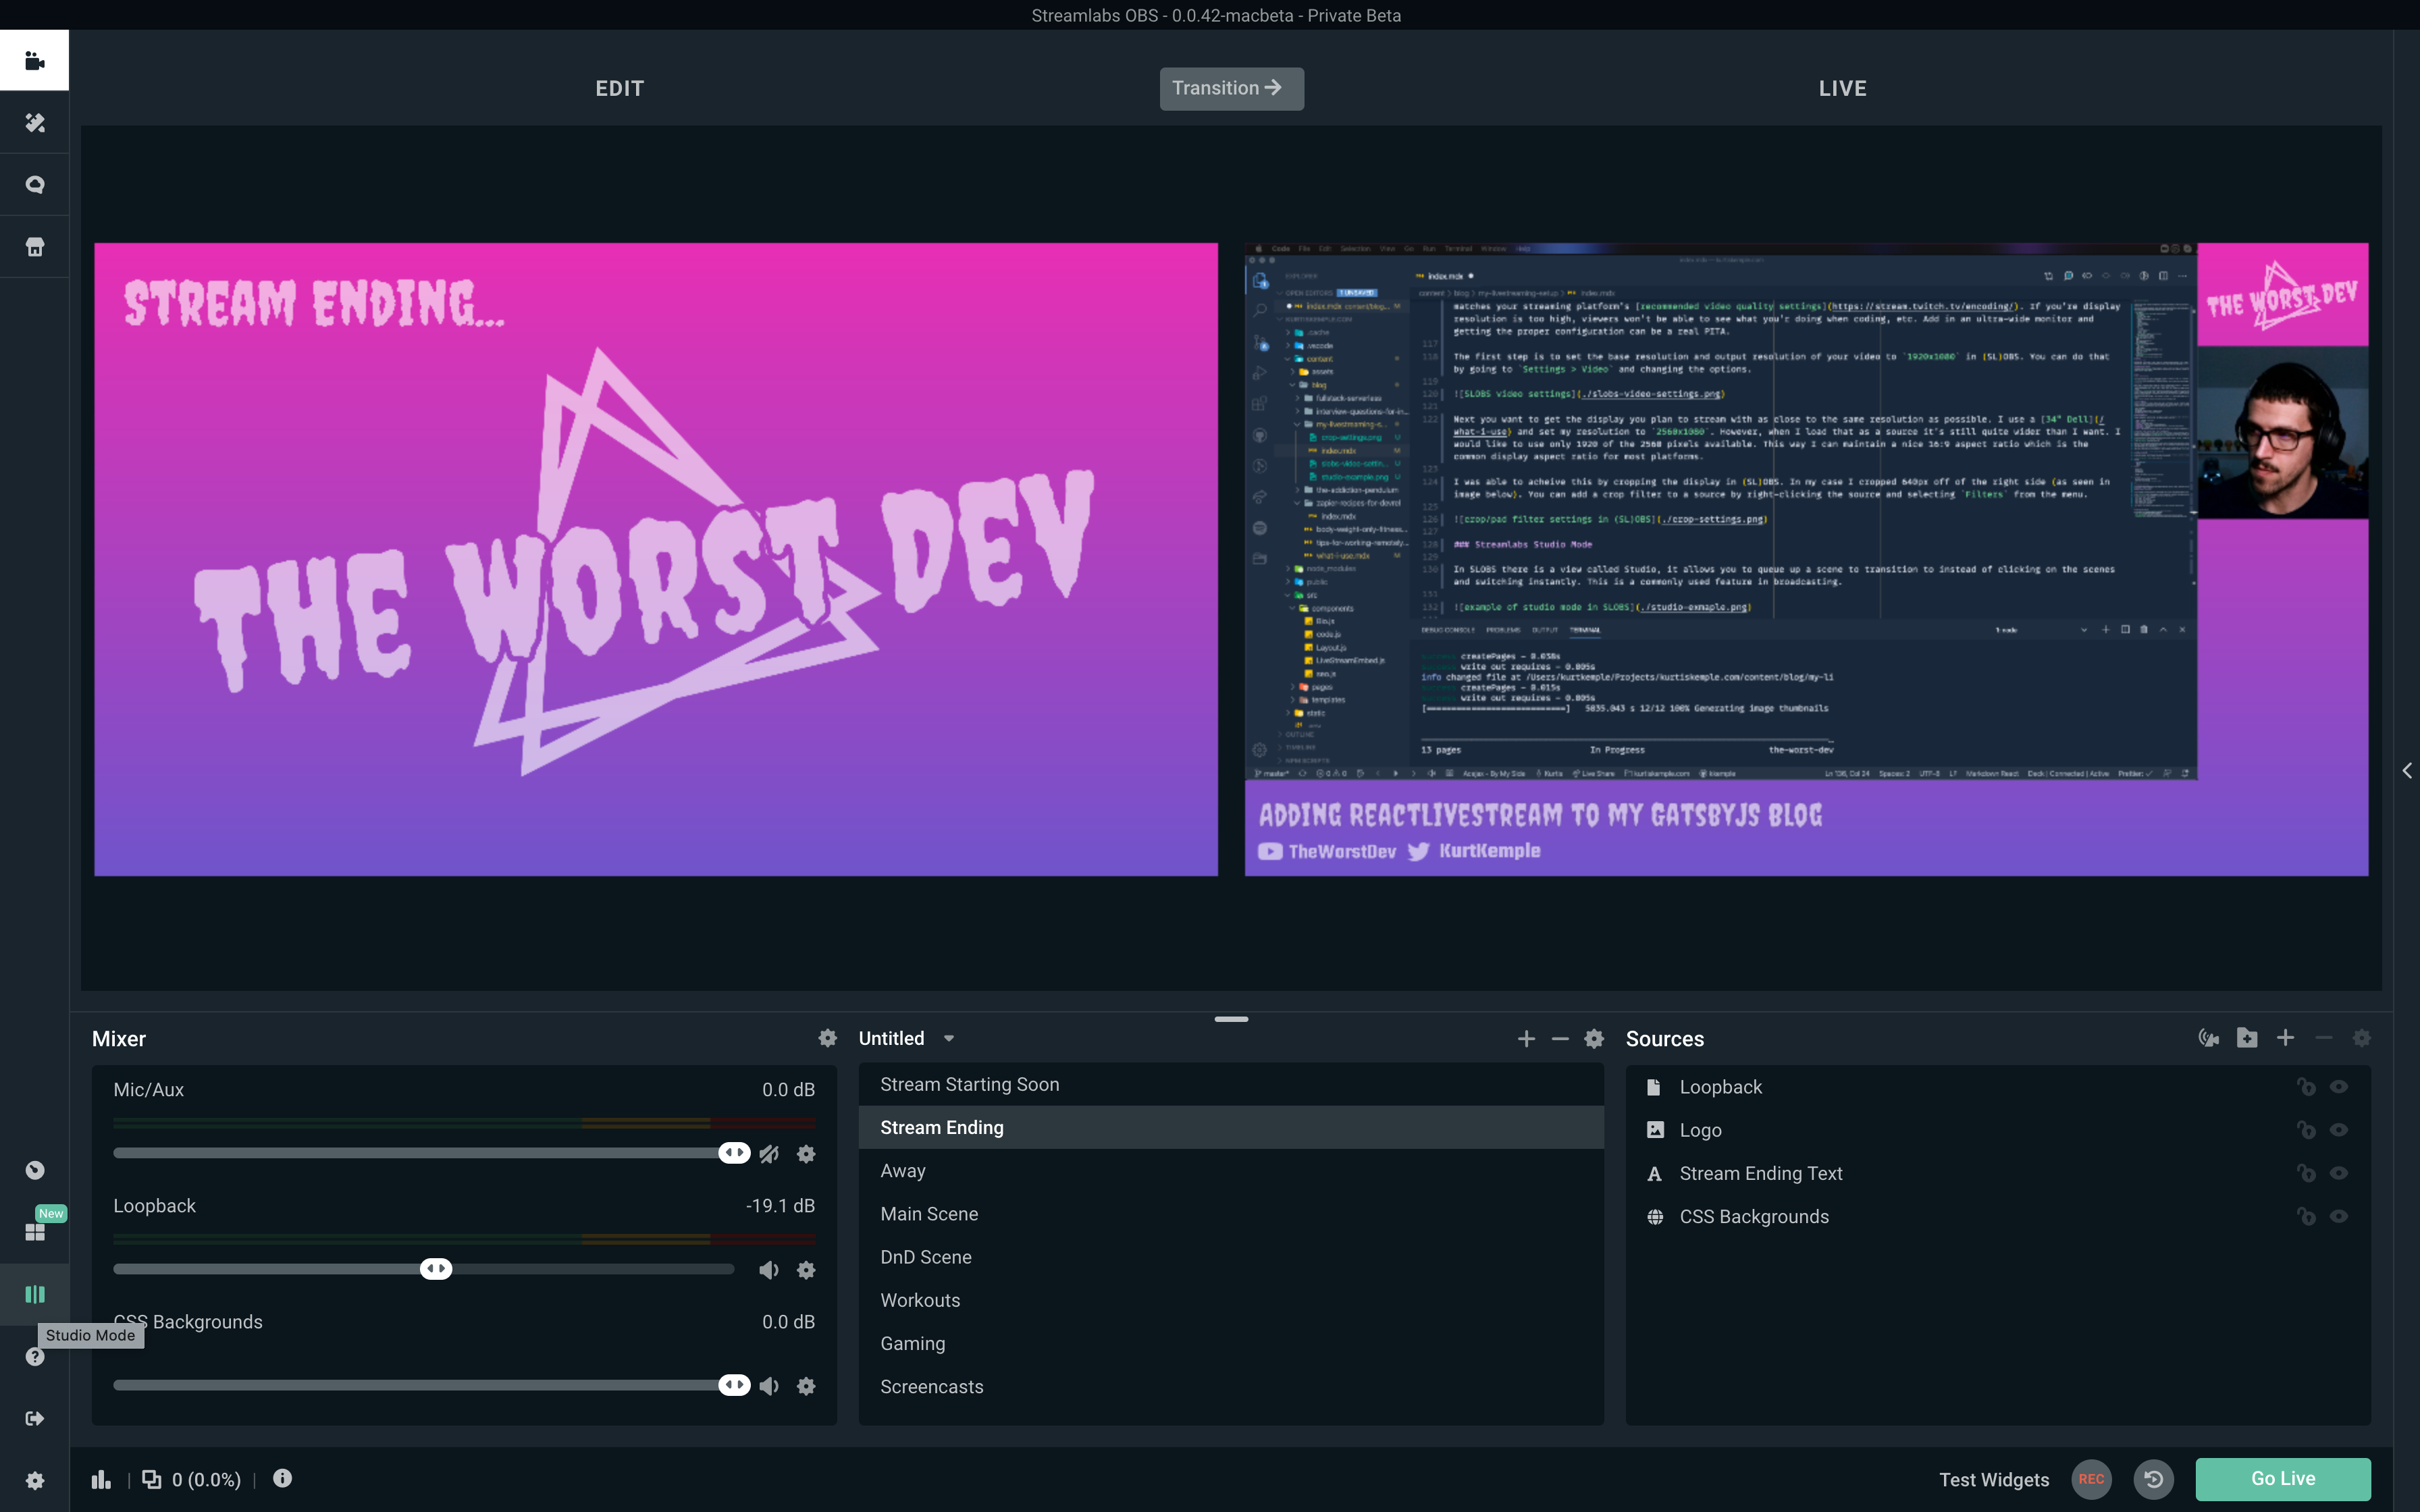
Streamlabs Studio Mode
In SLOBS there is a view called Studio, it allows you to queue up a scene to transition to instead of clicking on the scenes and switching instantly. This is a commonly used feature in broadcasting.
Power
You will need, and I can not stress this enough, a really big surge protector with a bunch of plugs available. Between the shear number of devices you'll need to plug in and the obsurd shape of half of them, you'll need plenty of room for everything. It's also a lot of power, so having a surge protector is going to protect your equipment if one of them decides to go on you.
There is also going to be a large number of things that need to get connected to your computer. Do yourself a favor if you can and get a docking station. I stream from my laptop and constantly connecting/unconnecting everything became really annoying. By using a docking station I now only have to attach a single usb cable to be ready to stream.
Video
Camera Requirements
When it comes to video there are a couple of choices available but the biggest factors are that:
- That the camera have true HDMI output (most webcams are just not great quality video)
- That the camera support clean HDMI output
- That the camera support a power supply and not only batteries (my camera only supports batteries and I have to constantly make sure I have a charged battery, super annoying)
I peronsally use a Canon 80D with an EF-S 18/135mm lens mounted to my desk with an Elgato Multi-mount. Links to all of these are available in my what I use post.
Video to Webcam Converters
Once you know you have a camera that can provide clean HDMI output you need a capture device that can convert that video feed into a webcam. There are two major options that I'm aware of for this:
- Black Magic Web Presenter: Supports both HDMI and SDI (common on some camera lines) video and is more expensive than the other option
- Elgato Cam Link: only supports HDMI but has support for higher resolutions, slightly cheaper than the other option
Lighting
Control Your Lighting
If you plan to stream near a window I highly recommend getting some kind of blackout curtains so that you can have complete control over your lighting. You don't want to find yourself having to adjust your light/camera settings because the room is slightly brighter than it was last time you streamed. The consistency also makes it one less thing you have to worry about doing before you go live.
Foreground Lighting
You want to make sure that no matter how dark your environment is, you can be seen clearly. A great way to do this is with some sort of diffused light (diffused so it's not too harsh). You can accomplish this with a ring light, photography soft box light, or gaming light. I personally use the Elgato KeyLight because it is configurable on your computer or Streamdeck (more on those later), has a wide range of color and brightness settings, and comes with a desk mount. You can find the link to it in my what I use post.
Backgrounds and Background Lighting
When it comes to backgrounds you have quite a few options:
- Green Screen: A lot of streamers use a green screen as a background so they can immerse themselves more into the stream.
- Solid Background: Another common approach is to position yourself with something solid behind you like an acoustic wall, sheet, or relatively blank wall.
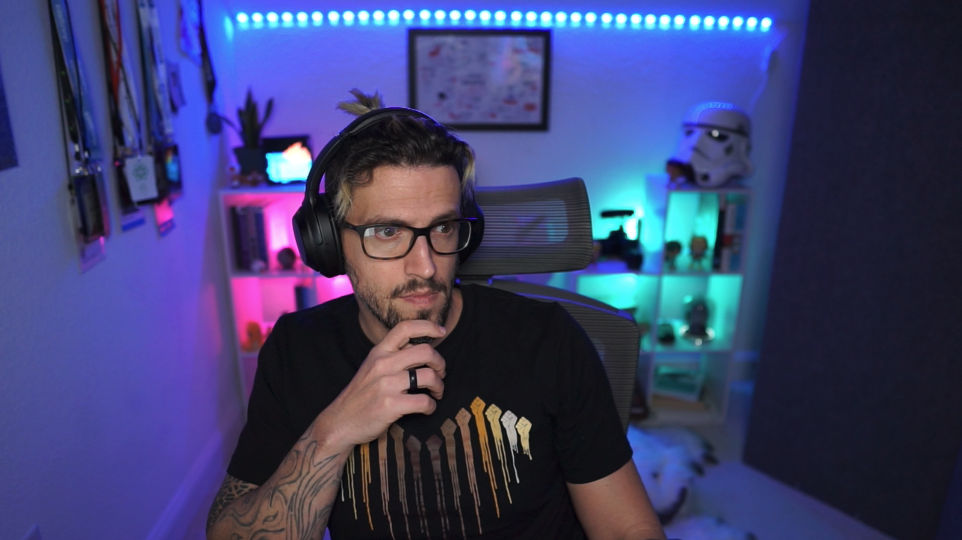
- Bacground Scenes: Other folks, myself included, like to create a nice background scene with decorations and/or lighting. I have some of my favorite collectibles, books, and camera lenses behind me with some fun lights to add background lighting.
Audio
The Cone of Silence
Much like with lighting, it's important to control the acoustics in your environment as much as possible. I use an acoustic divider to block noise coming from inside my house and because my desk is next to a window I use a sound absorption blanket to 1) block out light, 2) block out outside noise. Links to both can be found in my what I use post.
Mic
This is the one area where I recommend getting the best possible piece of equipment you can. I don't know why, but it's easy to forgive not great video on a stream, but it's really hard to follow a stream with bad audio quality. Lots of distracting background noise or too much reverb are sure-fire ways to lose viewers. I personally use a Shure microphone with some accessories. Check out my what I use post for more info on my mic setup.
Desktop Audio
Capture Audio on Windows
I use a Mac so I could be wrong here, but I believe you can use the Audio Input source without having to do anything else! If I'm wrong here let me know so I can correct this post!
Capture Audio on Mac (for free)
When it comes to capturing desktop audio on a Mac, things get a little weird. The most common way I found to do this was to use an app called iShowU and a virtual MIDI device and load that into SLOBS. It wasn't fun to set up but did work. However, it gets really hard to control the individual volume of apps and make sure they are all level for your stream. It's also really hard to block sounds you don't want to come through like message notifications, etc.
Capture Audio for Mac (paid)
After getting frustrated trying to get my audio settings correct I stumbled upon Loopback which is a paid app that lets you create virtual audio inputs (or outputs) and control the volume for each individually. You can also create as many devices and combos as you want. I have one for the stream output, another I use for stream guests, and a few others for things like background music when the stream starts. You can find a link to it in the software section of my what I use post.
Supporting Guests
You may want to have other people join you on your stream. If you find yourself in this situation I highly recommend using Skype. Skype supports NDI which allows you to add each participant to (SL)OBS as their own audio and video. This makes it much easier to set up scenes for mulitple people.
If you hit issues with guest video sources resizing unexpectedly, you can add a
scale / aspect ratio filterand set the base resolution for the video source to 1280x720p and then you can apply any cropping or padding on top of that.
Loopback, which was mentioned in the capturing desktop audio section, makes it possible to create an audio input with your mic, music source, and apps that your guests may want to also hear.
Streaming Gaming Consoles
Once I started streaming I realized how much I enjoyed it and I wanted to stream more than coding. If you want to stream games I suggest getting a capture card from Elgato. It uses NDI and makes your gaming system output (audio and video) available in (SL)OBS. I use it with my Switch and it works great.
Personalizing Your Stream
The first thing I discovered about Twitch was that most streams that one would consider professional were extremely personalized, or branded if you will.
Channel Assets You Can Change
There are a couple assets that you need for things like when you are offline, when you want to pause a stream, and then what you want displayed on screen when you're actually streaming (also known as a scene, more on scenes in a bit).
I found this article which does a good job of laying out what assets are needed and what size Twitch recommends for each asset. The basic sizes are:
- Twitch Offline Banner: 1920 x 1080 pixels
- Twitch Panels: 320 x 100 pixels
- Twitch Profile Banner: 1200 x 380 pixels
- Twitch Profile Picture: 256 x 256 pixels
- Twitch Thumbnail: 1280 x 720 pixels
- Twitch Overlay: 1920 x 1080 pixels
- Twitch Scene: 1920 x 1080 pixels
You can find a bunch of Twitch focused designers on fiverr
Using a Stream Asset Service
There are also platforms like Streamlabs and StreamElements that provide a lot of features such as overlays, custom alert widgets, chat boxes, and much more.
Go Live Checklist
This is just a few things that I make sure I do before each stream, your list will differ in ways I'm sure, but I thought it might be useful to at least cover these:
- Make sure to update the title and tags for your stream
- Test video and lighting to make sure you're clear and in focus
- Test audio levels to make sure that volume is correct
- Have stream chat open and available so you can interact with viewers

