Automating Promotion for Livestreams
Currently, I stream for Apollo GraphQL anywhere from 3-5 times a week. This may not seem like a lot, but when you take into account all the work that needs to happen outside of the actual stream, you can quickly see how it might start to eat up all of your time.
Let's walk through what's involved in getting a stream set up:
- Getting the schedule worked out (if it's with guests)
- Creating a calendar event for the guest(s)
- Get streaming instructions to guest(s)
- Creating a separate calendar event for the public with a description of the stream and who will be on it
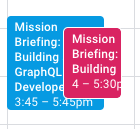
- Create a social media image with stream info with guest avatars
- Promote the stream 2 days before
- Promote the stream 1 day before
- Promote the stream 2 hours before
This isn't THAT much work, however, when you need to repeat this process 3-5 times a week, it really starts to add up and can become a bit overwhelming. This also isn't my only responsibility!
It became very apparent that if I didn't figure out how to automate this process as much as possible I would end up drowning in creating social media images and struggle to properly promote streams.
Lately, I've been really into process automation with tools like Zapier and Pipeline and figured the best course of action would be to automate as much of this process as possible.
What follows is how I manage setting up a steam from inception to "go live"!
Getting a Stream Scheduled
The first part is pretty interesting and sets up everything needed to automate the promotion of the livestreams. Once I have a time and date confirmed with my guest(s), I create a calendar event on my work calendar that I can add them to. This invite has all the info they will need to be able to participate on the stream. I use a template to limit having to repeat this myself and make sure to personalize towards each guest/stream. Here's the template:
Hey {name}!

We’re excited to have you on our stream and are looking forward to learning more about {you || your project || that feature}!

Streaming should be fun and easy, so we’ve prepared a guest checklist to make sure you’re ready to go. Ahead of our stream, please do the following:

- Respond to this invite with the following information:

  - Your preferred name
  - Your twitter handle (if you have one)
  - Your pronouns

- Set up in a place that’s comfortable and as quiet as possible.
- Ensure that you have a working webcam.
- Set up a high-quality microphone if you have one available. (We recommend investing in a mic if you’re able to! Headphone and built-in laptop mics tend to have poor quality.)
- Install Skype and make sure you’re able to join a Skype call.
- If we’ll be working with non-native code, install both VSCode and its LiveShare extension if you haven’t yet (also be signed in to LiveShare).
- If we’ll be working with third-party services, hide any .env files from your file tree, so you don’t accidentally share secure credentials.
- Have a working account for any services you plan to use.

And that’s it! If you have all of this sorted out, you should be good to go.

Also, while streaming is a looser format, we ask that all guests adhere to our Code of Conduct and avoid the use of explicit language.

We can’t wait to have you on our stream!

The Apollo DevRel Team
This event should also start 15 min before the actual stream start time, and end 15 min after the stream end time. This gives me time to get guests on a Skype call, get them loaded into the stream scenes, and allows us a few minutes to conversate before going live which I have found makes it a little less intimidating for first-time streamers.
Once everything is confirmed, I create another calendar event, this time on the public events calendar for Apollo with the proper start and end time for the steam. I add a description of the stream and include Twitter handles for myself and the guests in that description.
The description on the public event is used for all of the automation in promoting the stream. More on this in a bit!
Automating Promotion From Gcal Events
Now that all the manual work is done, I have everything I need to automate promoting the stream.
The first thing I did was to set up Zapier workflows that would trigger at the specified time before an event starts. In this case:
- 2 days before
- 1 day before
- 2 hours before
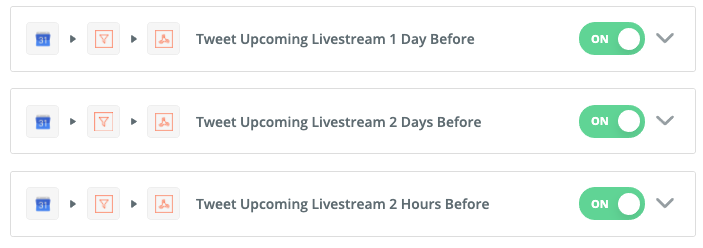
The only thing these workflows do is pass the event info to a Pipedream workflow so that I can parse the event data and build the tweet content and social media image url for Cloudinary.
Cloudinary is an asset management platform that has some really powerful features for creating dynamic images.
Building Social Media Images
Building the social media images is a two step process.
The first step is to fetch the avatars for any streamers mentioned in the event description from Twitter. The code looks like this:
async (event, steps, auths) => {
  const axios = require("axios");
  const oauthSignerUri = auths.twitter.oauth_signer_uri;

  const usernames = steps.trigger.event.body.description.match(/@[\w|\d]+/gm);
  const users = await Promise.all(
    usernames.map(async (username) => {
      const queryString = `q=${username}`;

      const config = {
        url: `https://api.twitter.com/1.1/users/search.json?${queryString}`,
        method: "GET",
        data: "",
      };

      const token = {
        key: auths.twitter.oauth_access_token,
        secret: auths.twitter.oauth_refresh_token,
      };

      const signConfig = {
        token,
        oauthSignerUri,
      };

      const [user] = await require("@pipedreamhq/platform").axios(
        this,
        config,
        signConfig
      );
      return user;
    })
  );

  this.users = users;
};
If you look at the highlighted line in the code example above, you can see how I use a regex to grab the Twitter handles of the stream guests.
This is a "step" in Pipedream and you combine steps to make a "workflow". So the incoming webhook from Zapier is caught and then that info is used to get the info needed to create the image as well as the tweet content.
Once I have the Twitter users I can then create the social media card using Cloudinary. I have templates uploaded for each of our "shows" and based off of the event title, I can figure out which show I'm currently working with. Check out the code below for an example:
async (event, steps) => {
  const showConfig = {
    missionBriefing: {
      borderColor: "7ED9A4",
      imageTemplate: "mission-briefing_g1peo9",
    },
    launchPad: {
      borderColor: "F59140",
      imageTemplate: "launch-pad_s2cd6n",
    },
    orbit: {
      borderColor: "7A92F0",
      imageTemplate: "orbit_toilzo",
    },
  };

  const encodedProfileURLs = steps.search_twitter.users.map((user) => {
    const buff = Buffer.from(
      user.profile_image_url_https.replace("_normal", "")
    );
    return buff.toString("base64");
  });

  const [showName, title] = steps.trigger.event.body.summary.split(": ");

  let show;
  switch (showName) {
    case "Mission Briefing": {
      show = showConfig.missionBriefing;
      break;
    }
    case "Launch Pad": {
      show = showConfig.launchPad;
      break;
    }
    case "Orbit": {
      show = showConfig.orbit;
      break;
    }
  }

  let profileImages;
  switch (encodedProfileURLs.length) {
    case 1: {
      profileImages = `l_fetch:${encodedProfileURLs[0]},g_east,w_200,h_200,r_max,x_215,bo_6px_solid_rgb:${show.borderColor}`;
      break;
    }
    case 2: {
      profileImages = `l_fetch:${encodedProfileURLs[0]},g_north_east,w_185,h_185,r_max,y_100,x_290,bo_6px_solid_rgb:${show.borderColor}/l_fetch:${encodedProfileURLs[1]},g_south_east,w_185,h_185,r_max,y_100,x_135,bo_6px_solid_rgb:${show.borderColor}`;
      break;
    }
    case 3: {
      profileImages = `l_fetch:${encodedProfileURLs[0]},g_north_east,w_170,h_170,r_max,y_50,x_320,bo_6px_solid_rgb:${show.borderColor}/l_fetch:${encodedProfileURLs[1]},g_east,w_170,h_170,r_max,x_220,bo_6px_solid_rgb:${show.borderColor}/l_fetch:${encodedProfileURLs[2]},g_south_east,w_170,h_170,r_max,y_50,x_115,bo_6px_solid_rgb:${show.borderColor}`;
      break;
    }
    case 4: {
      profileImages = `l_fetch:${encodedProfileURLs[0]},g_north_east,w_120,h_120,r_max,y_40,x_365,bo_6px_solid_rgb:${show.borderColor}/l_fetch:${encodedProfileURLs[1]},g_east,w_120,h_120,r_max,x_285,y_-80,bo_6px_solid_rgb:${show.borderColor}/l_fetch:${encodedProfileURLs[2]},g_east,w_120,h_120,r_max,x_200,y_80,bo_6px_solid_rgb:${show.borderColor}/l_fetch:${encodedProfileURLs[3]},g_south_east,w_120,h_120,r_max,y_40,x_120,bo_6px_solid_rgb:${show.borderColor}`;
      break;
    }
    case 5: {
      profileImages = `l_fetch:${encodedProfileURLs[0]},g_north_east,w_110,h_110,r_max,y_40,x_375,bo_6px_solid_rgb:${show.borderColor}/l_fetch:${encodedProfileURLs[1]},g_north_east,w_110,h_110,r_max,x_310,y_165,bo_6px_solid_rgb:${show.borderColor}/l_fetch:${encodedProfileURLs[2]},g_east,w_110,h_110,r_max,x_245,bo_6px_solid_rgb:${show.borderColor}/l_fetch:${encodedProfileURLs[3]},g_south_east,w_110,h_110,r_max,y_165,x_175,bo_6px_solid_rgb:${show.borderColor}/l_fetch:${encodedProfileURLs[4]},g_south_east,w_110,h_110,r_max,y_40,x_115,bo_6px_solid_rgb:${show.borderColor}`;
      break;
    }
  }

  const image = `https://res.cloudinary.com/apollographql/image/upload/l_text:Source%20Sans%20Pro_30_bold_letter_spacing_12:${showName.toUpperCase()},g_north_west,x_53,y_235,co_rgb:9EFDA8/l_text:Source%20Sans%20Pro_72_black:${encodeURIComponent(
    title.replace(/\,/g, "%2C").replace(/\//g, "%2F")
  )},g_north_west,x_50,y_280,w_800,c_fit,co_rgb:FFFFFF/l_text:Source%20Sans%20Pro_30:Thursday%20-%20July%2022nd%20-%203pm%20EST,g_south_west,x_53,y_80,co_rgb:9EFDA8/${profileImages}/streaming/${
    show.imageTemplate
  }.png`;

  this.url = image;
};
Going through the highlighted bits of code, I first convert the avatar URLs for guests to base64 for use in Cloudinary, then parse out the show name and title so I know which template to use. After that I apply the proper avatar layout based on the number of guests (up to 5). Finally, I piece it all together into a Cloudinary URL that will be the completed social media card. 🤯
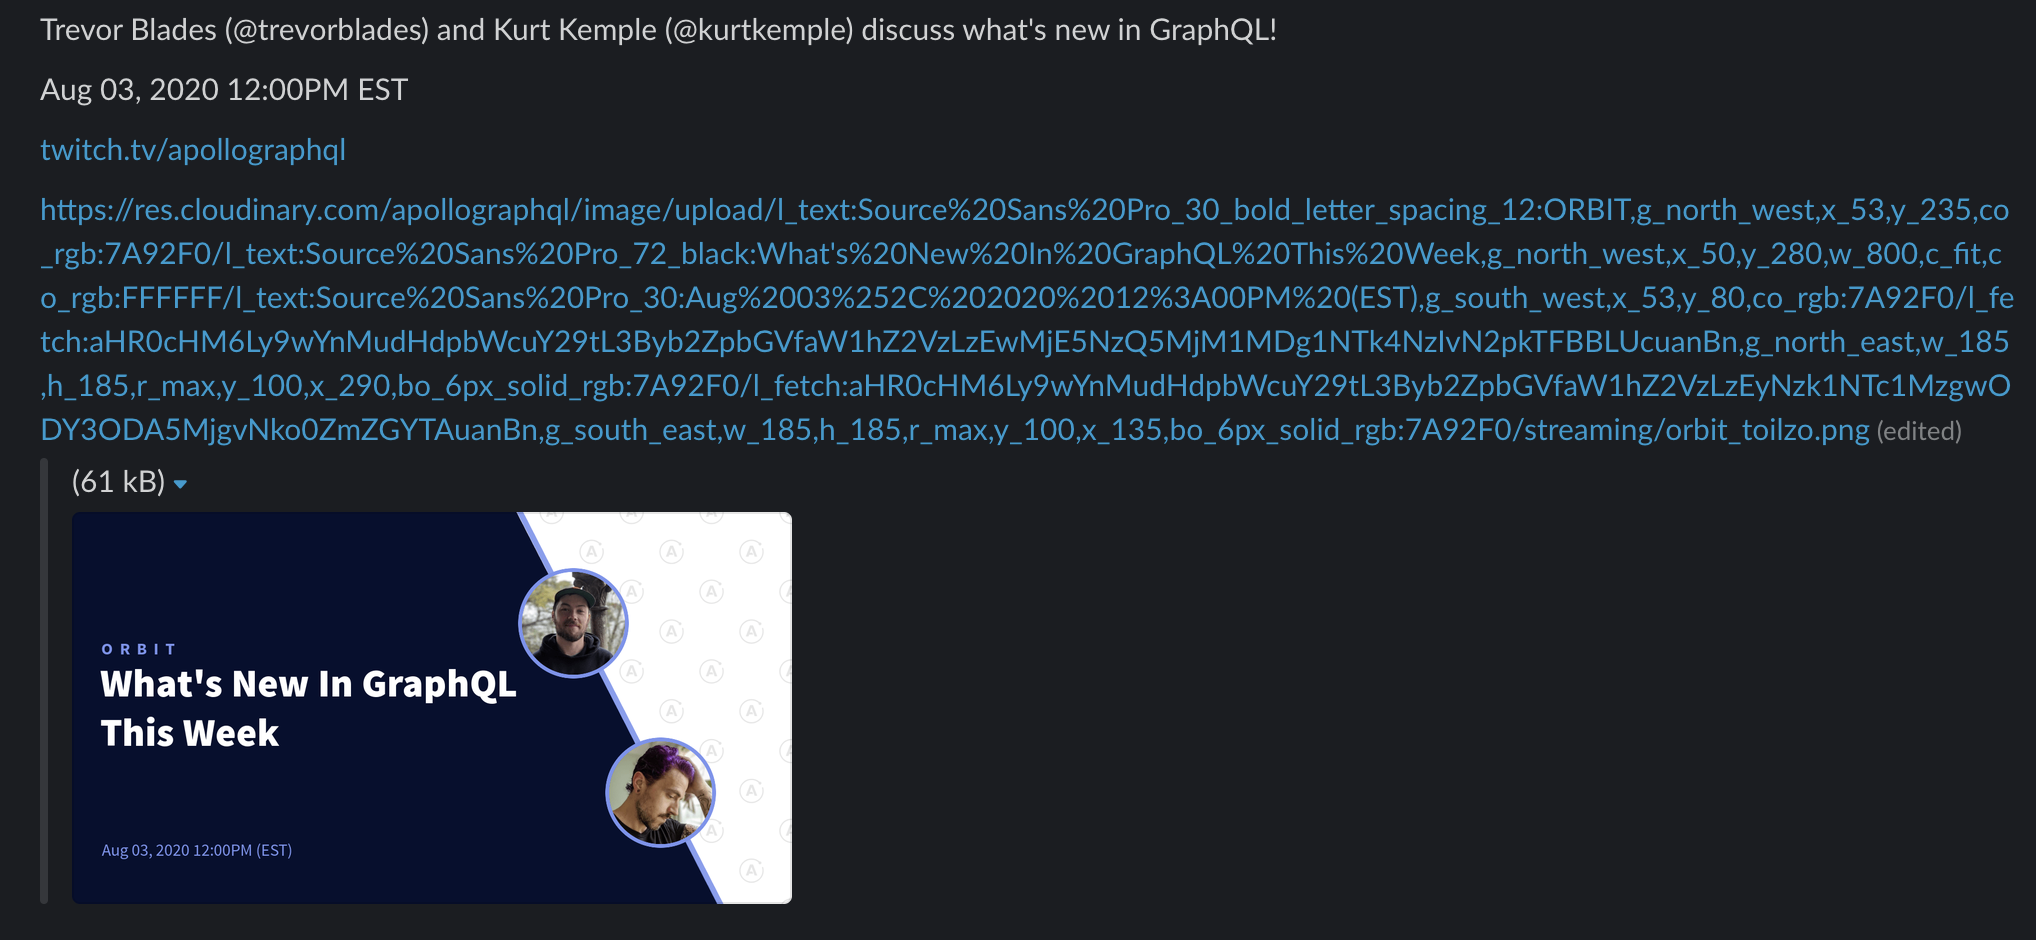
Once that is all done, the last step is to send myself a message in Slack with the tweet contents and social media image URL so that I can tweet about the stream.
The reason this last part isn't automated anymore is that Twitter doesn't let you @mention folks over the API anymore so I copy/paste the info from Slack into Twitter which only takes a few seconds.
The result is a Slack message to myself that looks like this:
Hopefully this sparks some ideas in your head about how you can automate some stuff away and take advantage of tools like Cloudinary, Pipedream, and Zapier to speed up your workflow or automate it all together!

